
How to contribute
Write or edit wiki guides in your browser. Step-by-step instructions for your first pull request, made for people who have never used GitHub.
Anyone can add to this wiki. Every guide is a text file stored on GitHub, a free website where people work on files together. You suggest a change. A maintainer checks it and publishes it.
Before you start
You need a free GitHub account. Create one at github.com/signup. That is the only setup.
Three words you will see a lot:
- A fork is your own copy of the wiki's files on GitHub.
- A commit is a saved change to those files.
- A pull request (or PR) asks the maintainers to publish your change.
Write a new guide
The wiki has a visual editor. You write in the browser and see a live preview. No downloads, no code.
- Click Contribute in the top bar. A window with two options opens.
- Pick Visual editor. The editor opens.
- Fill in Title, Category, and Description.
- Write your guide on the left. The right side shows how the published page will look.
The toolbar drops in ready-made components like callouts and video embeds.
Type @ to link to another guide. See the components
page for everything you can use.
Ready to send it in?
-
Click Contribute in the top right.
-
The editor may suggest links to other guides it found in your text. Click the ones you want, then click Continue to GitHub.
-
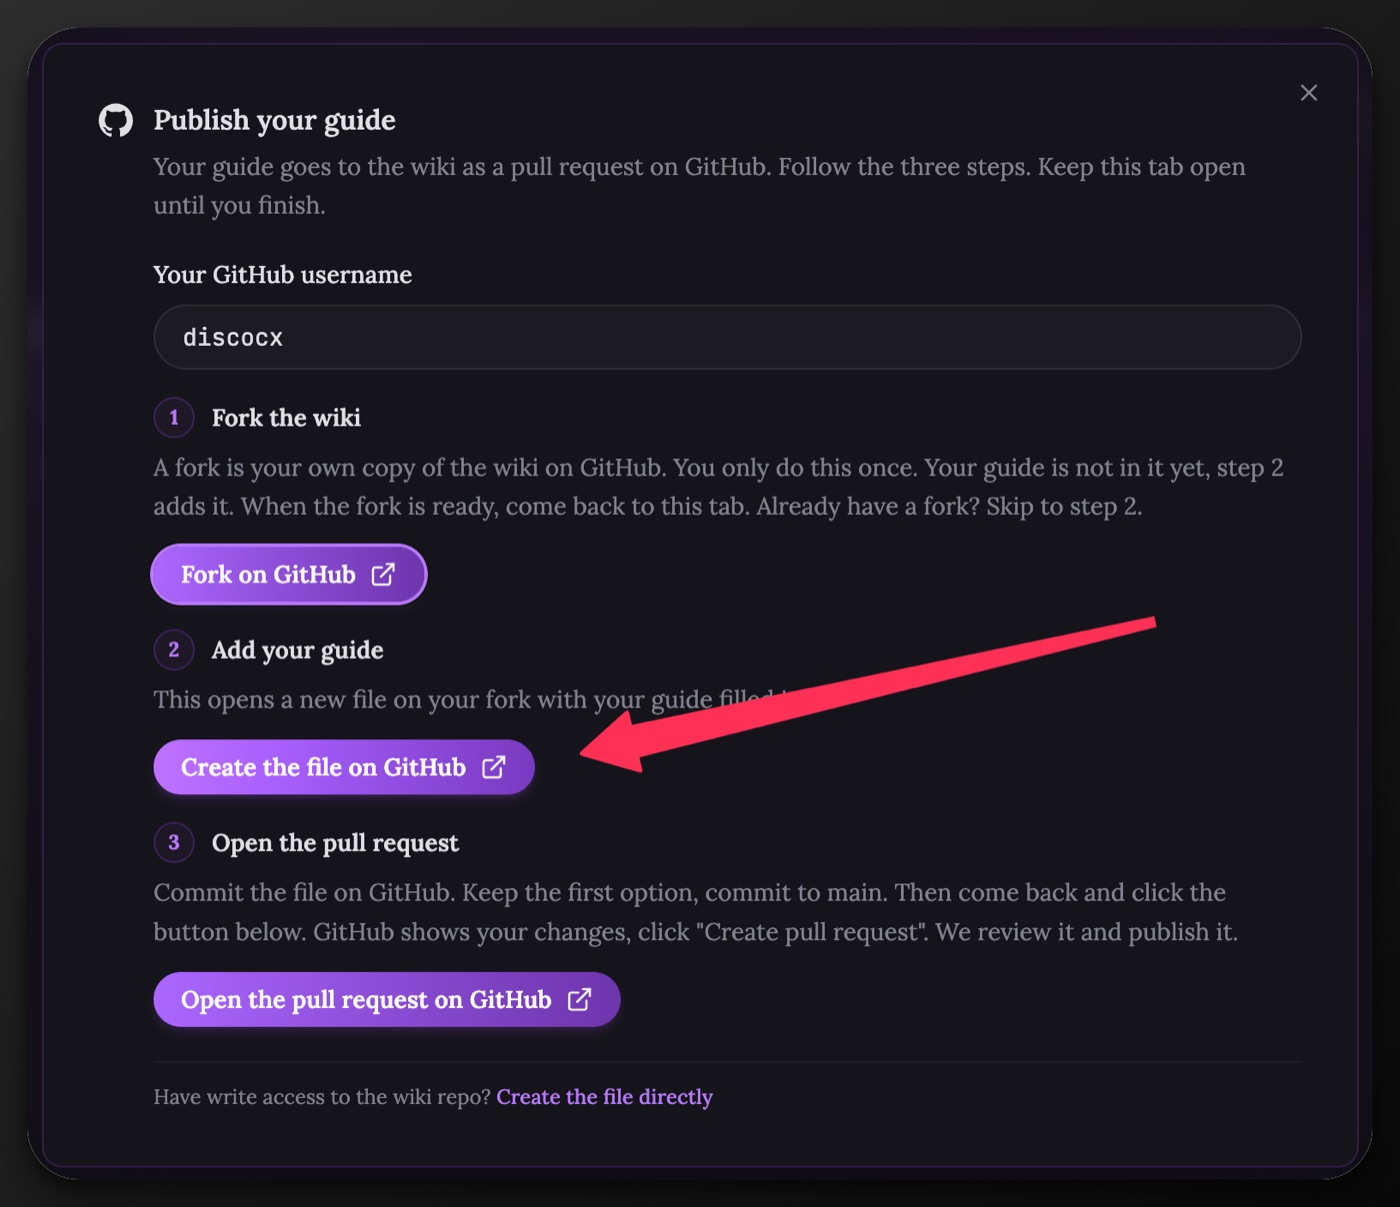
The Publish your guide window opens. It has three steps. Keep this tab open until you finish.
-
Type your GitHub username in the box. The buttons below use it to find your fork.
-
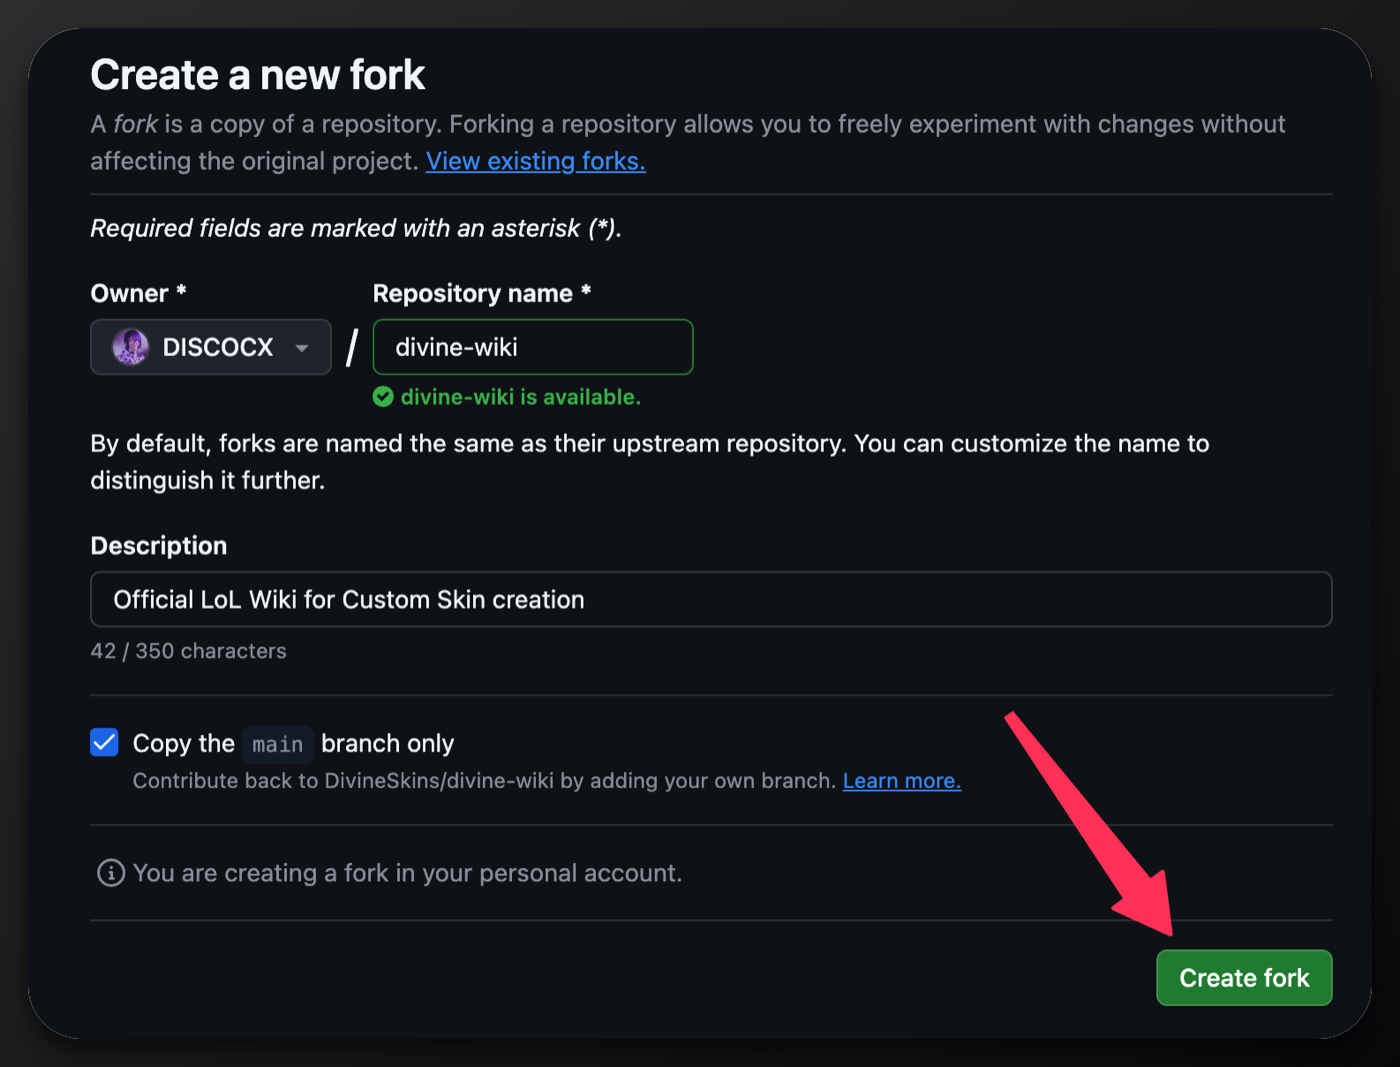
Click Fork on GitHub. GitHub opens the Create a new fork page. Click the green Create fork button. This makes your own copy of the wiki. You only do this once. Already have a fork? Skip this step.
-
Come back to the wiki tab. Click Create the file on GitHub.
-
GitHub opens a new file on your fork with your guide filled in. Check the file name and the text. Then click the green Commit changes... button in the top right.

-
A small window opens. Keep the first option, Commit directly to the main branch. Click Commit changes.

-
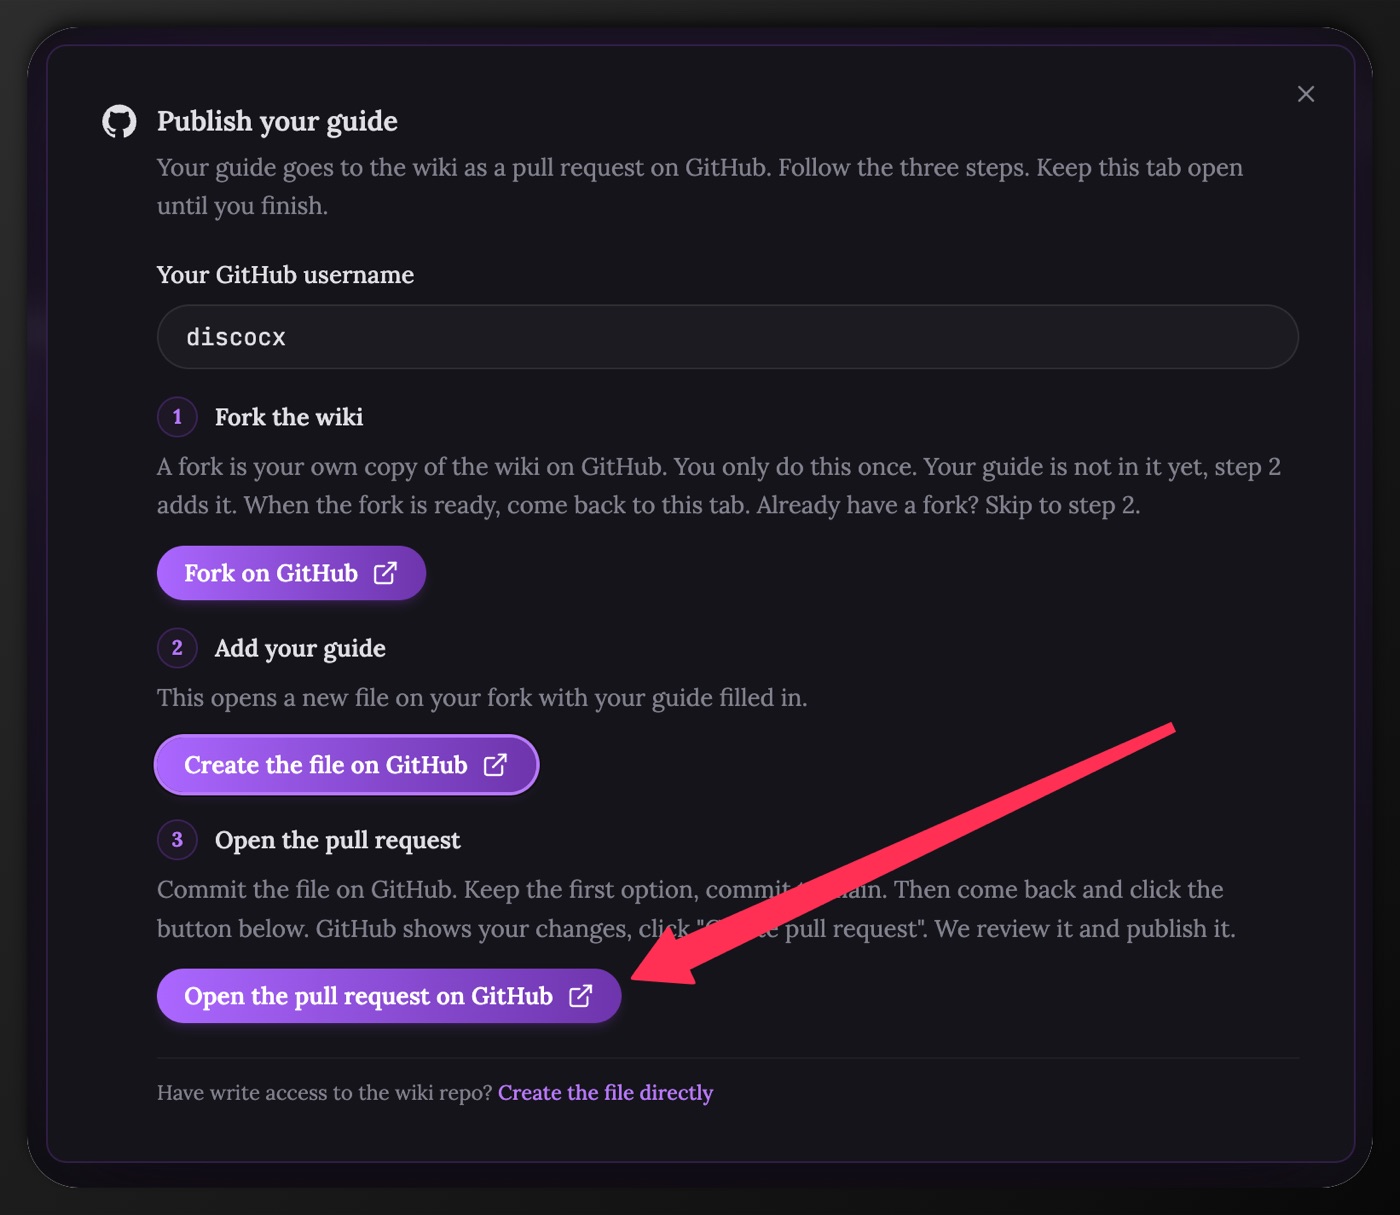
Come back to the wiki tab. Click Open the pull request on GitHub.
-
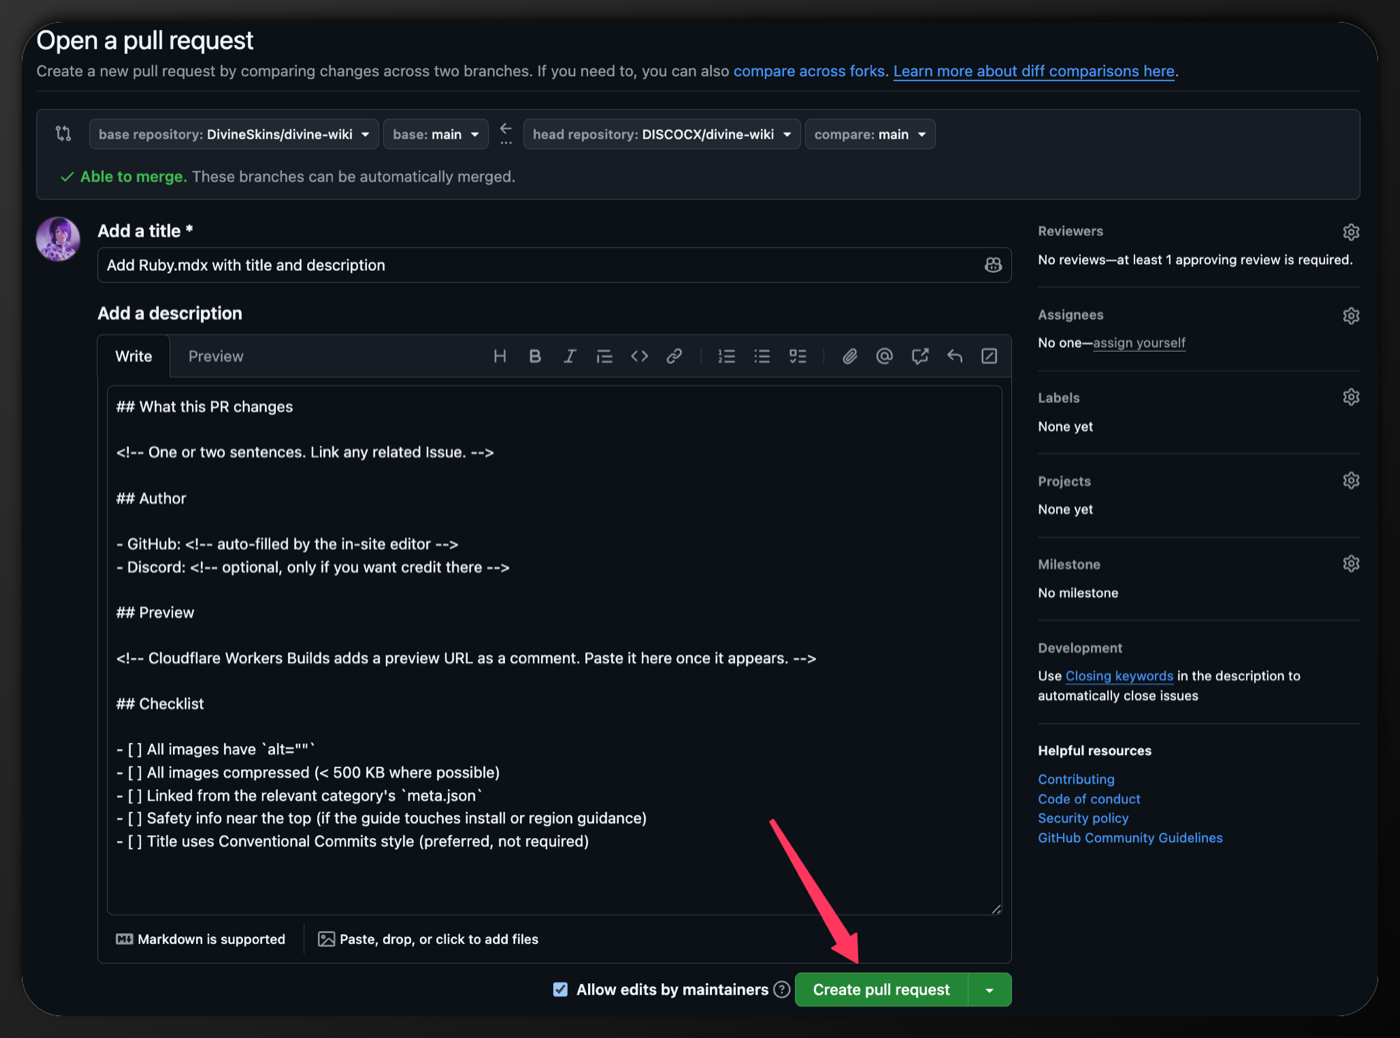
GitHub shows your changes and a form. Fill in the form. Leave Allow edits by maintainers checked. Click Create pull request.
That's it. A maintainer reviews your guide and publishes it. Did your guide use images? One more step: see Add images below.
Long draft? GitHub can't pre-fill very long files. Step 2 shows a Copy MDX button instead. Copy your draft, then paste it into the empty file GitHub opens.
Edit an existing guide
- Open the guide you want to change.
- Scroll to the bottom. Click Edit on GitHub. The visual editor opens with the guide loaded.
- Make your changes.
- Click Contribute.
- Click Copy MDX. GitHub can't pre-fill edits, so you paste them yourself.
- Click Open guide on GitHub.
- Click the pencil icon at the top right of the file.
- Select all the old text. Paste your copy over it.
- Click Commit changes..., then Propose changes, then Create pull request.
Add images
In the editor, click Upload image to put a picture in your guide. The picture shows in your preview right away. But the image file does not travel to GitHub with your text. You upload it yourself, after you commit the guide.
Upload your images after you commit
When your draft uses images, the Contribute window lists the exact file names to upload. Keep that list handy.

- Commit your guide first (the steps above), so your pull request exists.
- Go back to the wiki tab. In the Contribute window, click Upload on GitHub. Your fork's image folder opens.
- Drag your images in. Keep the file names exactly as your guide uses them.
- Click Commit changes. Keep the first option, commit to main.
The images join your pull request on their own. They show on the wiki once your pull request is merged.
Edited an existing guide instead? GitHub put your change on a branch with a
name like patch-1. Open your pull request, click that branch name near the
top, open public/wiki-images, then click Add file and Upload files.
Commit to the same branch.
Image rules
- Use lowercase file names with dashes:
my-screenshot.png, notMy Screenshot.png. - Give every image an alt text that describes it. Reviewers check this.
- Keep each file under 500 KB. Bigger files slow the site down.
- Use PNG for screenshots, JPG for photos. WebP works too.
What happens after you open a pull request
- A preview link appears as a comment on your pull request. Open it to see your change live.
- A maintainer reviews your text, links, and images. They may ask for small changes.
- Once approved, your change is merged. It goes live on the wiki within minutes.
Work on your computer (advanced)
For new categories, big rewrites, or many files at once, work locally. You need Node 22+, Git, and a code editor.
git clone https://github.com/<your-username>/divine-wiki.git
cd divine-wiki
npm install
npm run dev
Fork the repo at github.com/DivineSkins/divine-wiki first, then clone your fork. Open http://localhost:3000 to check the site loads. Make a branch, change files under content/docs/en/lol/, drop images into public/wiki-images/, then push and open a pull request to main.
Need help?
- Stuck on GitHub or the editor? Ask in
#wiki-feedbackon Discord. - Planning a big change, like a new category or a restructure? Post in
#wiki-proposalsfirst. It saves you from doing work that gets rejected.